Manicures have been in the news a lot this week, as some states begin to open up businesses like nail salons and gyms, and as desperate, washed up reality stars clamor for similar restriction-lifting in their backyards. Well, look, nothing I say here can stop you from going to a nail salon if you have access and are desperate to get your nails done, but I’d also guess that most of you reading this are probably willing to forgo the salon for a bit for the safety and health of yourself and others, and good for you! So let me, a person who did her own manicure even before All Of This, help you replicate the experience at home.
The first thing to do is to shape the nails so that they’re a uniform length and shape. If you need to, clip the nails and then file them, working in one direction—avoid sawing at the nail with the file, which will weaken the nail and lead to splitting and breaking. If you’re new to filing, using a finer file will give you more control, and placing the file slightly underneath the nail, tilted slightly toward you, will let you see what you’re doing so you can avoid over-filing.
Part of a manicure (the best part?!?) is the pampering aspect with the soaking, and the moisturizing, and the massaging. If you’re doing an at-home jobbie you might be tempted to skip this part but don’t, because it does serve a purpose beyond just feeling good: Soaking and moisturizing will soften cuticles up, making the next step—cuticle control—easier and more effective.
Hi hello here comes an important note! Cuticle removers and cuticle creams/oils are different products with different functions! Both are good and great, but cuticle removers are what we’re looking at for this portion of the proceedings.
Apply a cuticle removing product, making sure to read the manufacturer’s instructions for usage to be sure you’re leaving it on long enough to do its job. Then, gently push the cuticle back with an orange stick; avoid trimming cuticles with scissors, as it’s way too easy to cut too much which can be painful and will make your nails look raggedy and ugly.
If your hands are especially dry—and with all the hand washing we’re all doing right now, whose aren’t??—you can apply an exfoliating scrub, followed by a cuticle cream or oil to eliminate dead skin and add some extra moisturizing power; cuticle creams and oils will also serve to nourish the nails, which will keep them from drying out and splitting or peeling. After using a scrub and/or cream or oil, wash your hands well and use your orange stick to clean underneath your fingernails.
I was about to write, “Here comes the fun part!” but in all honesty, this is probably going to be the part that causes you the most anxiety and is therefore possibly the least fun part*. But here are some tips to help you master the art of painting your own nails:
- Start with clean, dry nails. The polish will go on wonky if residue from the moisturizers and oils you used is left behind.
- Don’t skip base and top coats. Using a base coat will help the polish to go on smoother, and a top coat will protect the manicure from chipping. Also, using a base and top coat allows you to practice your application technique!
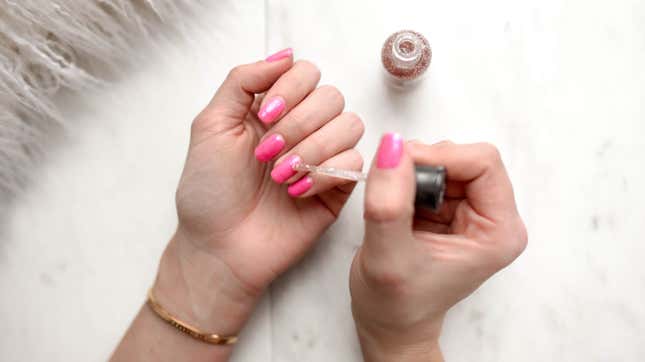
- Speaking of which! There is a trick to applying nail polish and this is it: Place the brush down on the center of the nail, and then push downward toward the cuticle. That’s how you’ll get that perfect half-moon look. It’s also the way to avoid doing what’s called “flooding the cuticle,” which is when the polish floods outward from the nail, pooling in the cuticle area and creating a sloppy look.
- It may seem counterintuitive but the longer the nail, the easier it is to paint.
- Breathe. Really! Not being comfortable painting your own nails can make people anxious, which will make things harder because your hand will be tense, and you want to apply polish in a fluid movement. So! Relax and don’t be too hard on yourself if you’re not a pro right away — painting your own nails is a skill that takes some practice, so go easy on yourself and stick with it. If you really mess up, you can always take off the polish and start over; the painting is actually the least time consuming part of the whole process, so try not to get too frustrated if you really mess up and have to start fresh since you’re really only adding an extra minute or two to your at-home manicure process.
- Also, video tutorials are a super helpful way to perfect your technique. This is the one I used to teach myself how to do my own nails.
*The least fun part is actually sitting still long enough to let your polish dry.
Once your polish is fully dry, you can do some clean up, if needed. Use an eye makeup brush dipped in polish remover to quickly and easily get rid of polish left behind by errant brush strokes or cuticle flooding.